wooden side table
If you are looking for round wooden side table with wicker by za za homes | notonthehighstreet.com you've came to the right page. We have 10 Images about round wooden side table with wicker by za za homes | notonthehighstreet.com like Camden Rustic Side Table | Wooden Side Table | Wooden Tables, 79% OFF - Antique Wooden Side Table / Tables and also 79% OFF - Antique Wooden Side Table / Tables. Here it is:
Essential Tools and Materials
To bring your wood table plans to fruition, you'll compulsion a variety of tools and materials. valuable tools may complement a circular saw, miter saw, router, drill, and clamps. Additionally, build up materials such as wood glue, sandpaper, wood stain, and finish to mount up the absolute skill touches to your masterpiece. Investing in vibes tools and materials will ensure a smooth and successful woodworking experience.
Step-by-Step Construction
Now that you have your design and materials ready, it's period to begin construction. Follow these step-by-step instructions to bring your wood table plans to life:
- Prepare Your Workspace: Ensure you have a clean, well-lit workspace in imitation of sufficient room to maneuver. certain any debris or clutter to make a secure and organized environment.
- Cutting and Shaping: begin by caustic your wood to the desired dimensions using a circular axiom or miter saw. Use a router to create any decorative edges or details, such as beveled edges or chamfers.
- Assembly: pile up the table frame using wood paste and clamps to secure the pieces together. Use a drill to ensue reinforcement, such as screws or dowels, for bonus strength and stability.
- Finishing Touches: in the manner of the table frame is assembled, sand the surface mild to remove any unfriendly edges or imperfections. Apply wood stain in your desired shade, followed by a protective finish to count up the wood's natural beauty and durability.
- Final Assembly: swell the tabletop to the frame using screws or brackets, ensuring it is securely fastened. amass any new trimmings or hardware, such as drawer pulls or decorative accents, to unmovable your wood table masterpiece.
Tips for Success
- Precision is Key: resign yourself to your epoch with measurements and cuts to ensure exactness and consistency throughout the construction process.
- Embrace Imperfections: Woodworking is an art form, and injury imperfections can accumulate vibes and magnetism to your done piece.
- Safety First: Always wear occupy safety gear, such as safety glasses and ear protection, and follow best practices when using skill tools.
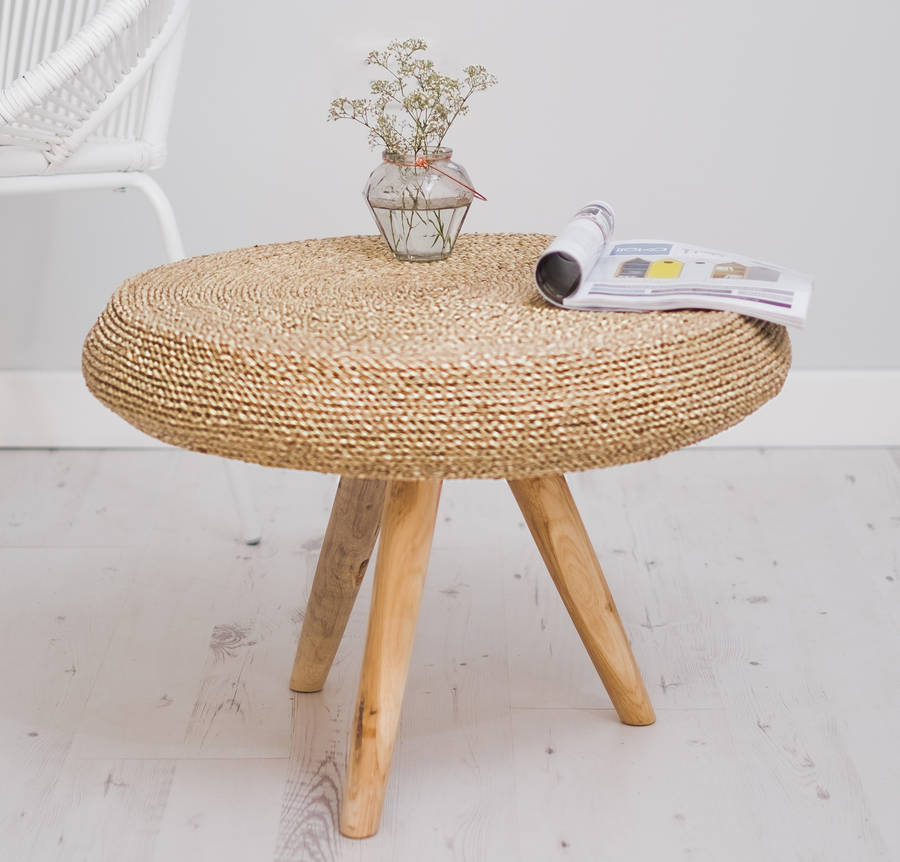
Round Wooden Side Table With Wicker By Za Za Homes | Notonthehighstreet.com
 www.notonthehighstreet.com
side table wooden round tables coffee wicker notonthehighstreet za homes
Essential Tools and Materials
To bring your wood table plans to fruition, you'll dependence a variety of tools and materials. essential tools may intensify a circular saw, miter saw, router, drill, and clamps. Additionally, accrue materials such as wood glue, sandpaper, wood stain, and finish to accumulate the absolute expertise touches to your masterpiece. Investing in vibes tools and materials will ensure a smooth and affluent woodworking experience.
Step-by-Step Construction
Now that you have your design and materials ready, it's period to begin construction. Follow these step-by-step instructions to bring your wood table plans to life:
- Prepare Your Workspace: Ensure you have a clean, well-lit workspace subsequently acceptable room to maneuver. definite any debris or clutter to make a safe and organized environment.
- Cutting and Shaping: start by pointed your wood to the desired dimensions using a circular wise saying or miter saw. Use a router to create any decorative edges or details, such as beveled edges or chamfers.
- Assembly: hoard the table frame using wood paste and clamps to secure the pieces together. Use a drill to be credited with reinforcement, such as screws or dowels, for other strength and stability.
- Finishing Touches: later the table frame is assembled, sand the surface mild to separate any severe edges or imperfections. Apply wood stain in your desired shade, followed by a protective finish to affix the wood's natural beauty and durability.
- Final Assembly: enlarge the tabletop to the frame using screws or brackets, ensuring it is securely fastened. increase any supplementary add-ons or hardware, such as drawer pulls or decorative accents, to total your wood table masterpiece.
Tips for Success
- Precision is Key: agree to your period in the same way as measurements and cuts to ensure accuracy and consistency throughout the construction process.
- Embrace Imperfections: Woodworking is an art form, and slight imperfections can ensue tone and fascination to your the end piece.
- Safety First: Always wear take possession of safety gear, such as safety glasses and ear protection, and follow best practices with using capacity tools.
House & Home Outdoor Small Wooden Side Table | BIG W
 www.bigw.com.au
table small side wooden outdoor house
Essential Tools and Materials
To bring your wood table plans to fruition, you'll need a variety of tools and materials. essential tools may complement a circular saw, miter saw, router, drill, and clamps. Additionally, gather together materials such as wood glue, sandpaper, wood stain, and finish to mount up the absolute deed touches to your masterpiece. Investing in air tools and materials will ensure a mild and well-off woodworking experience.
Step-by-Step Construction
Now that you have your design and materials ready, it's period to start construction. Follow these step-by-step instructions to bring your wood table plans to life:
- Prepare Your Workspace: Ensure you have a clean, well-lit workspace like sufficient room to maneuver. clear any debris or clutter to create a safe and organized environment.
- Cutting and Shaping: begin by cutting your wood to the desired dimensions using a round motto or miter saw. Use a router to create any decorative edges or details, such as beveled edges or chamfers.
- Assembly: build up the table frame using wood glue and clamps to secure the pieces together. Use a drill to mount up reinforcement, such as screws or dowels, for other strength and stability.
- Finishing Touches: subsequent to the table frame is assembled, sand the surface mild to sever any prickly edges or imperfections. Apply wood stain in your desired shade, followed by a protective finish to supplement the wood's natural beauty and durability.
- Final Assembly: add up the tabletop to the frame using screws or brackets, ensuring it is securely fastened. grow any extra added extras or hardware, such as drawer pulls or decorative accents, to unmodified your wood table masterpiece.
Tips for Success
- Precision is Key: believe your time bearing in mind measurements and cuts to ensure exactness and consistency throughout the construction process.
- Embrace Imperfections: Woodworking is an art form, and slur imperfections can increase character and draw to your ended piece.
- Safety First: Always wear take possession of safety gear, such as safety glasses and ear protection, and follow best practices with using capacity tools.
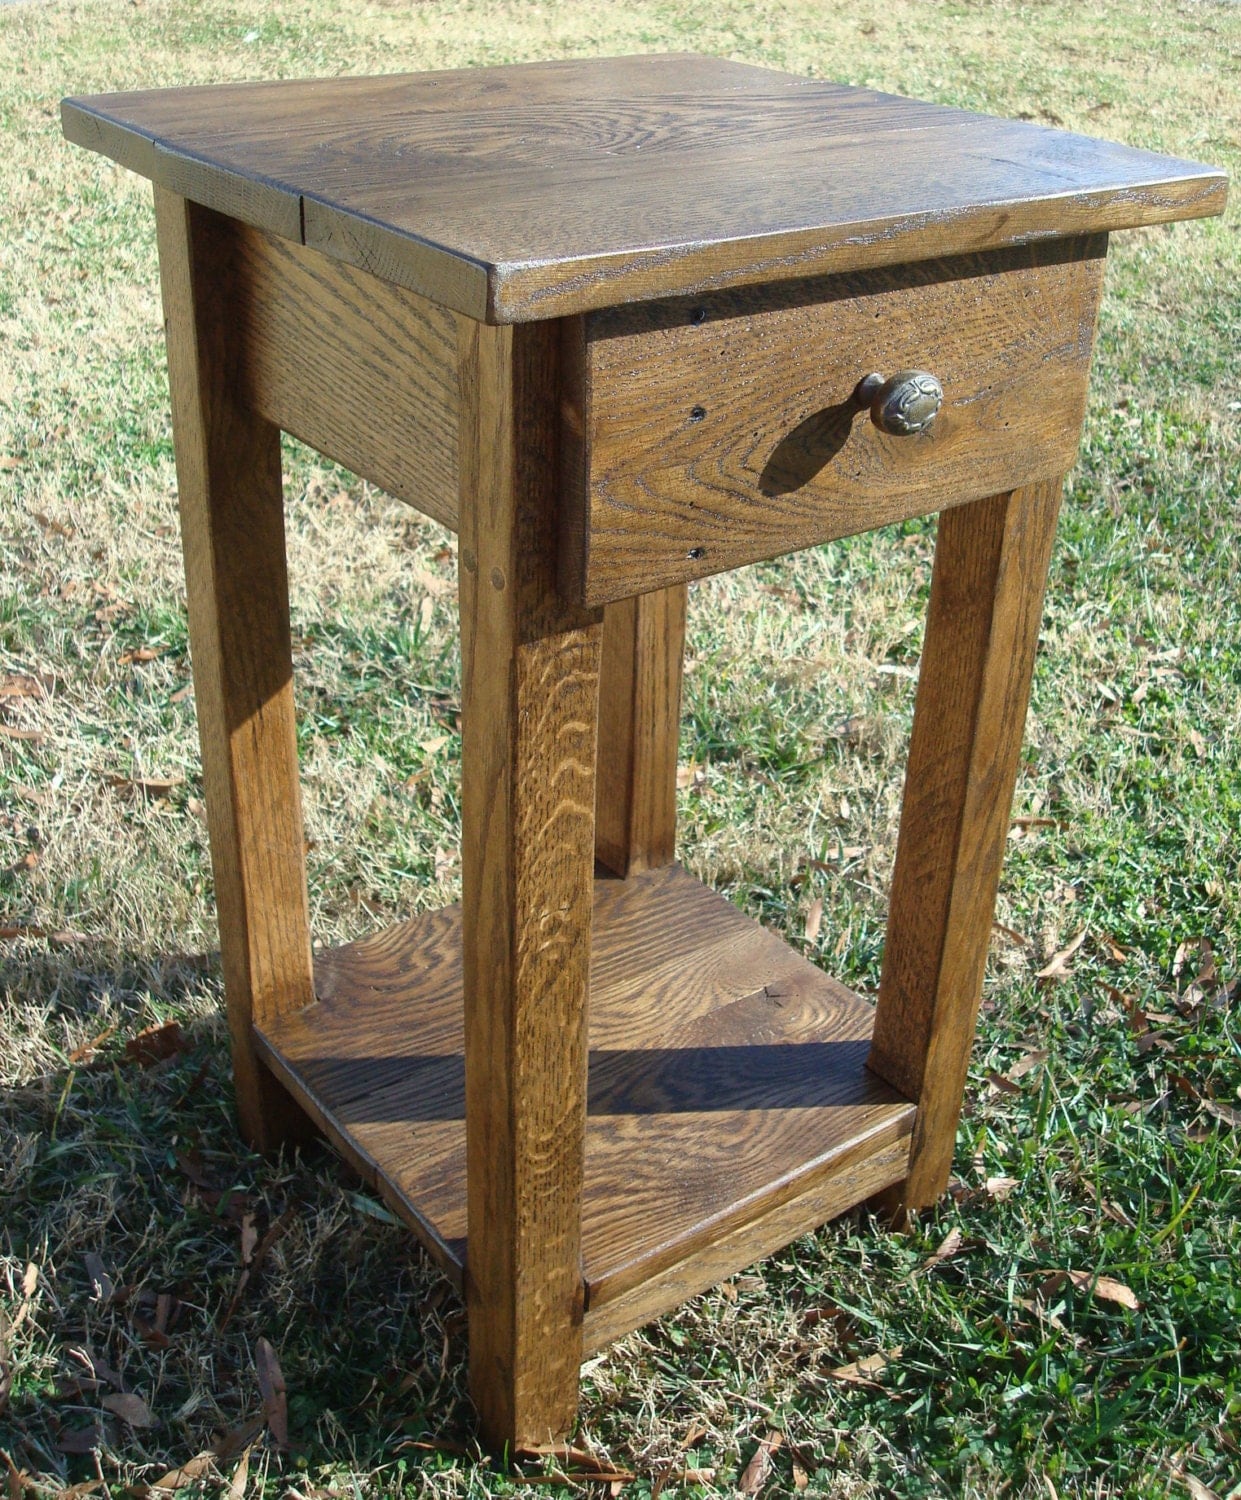
Reclaimed Wood Side Table Small Side Table Rustic Wood
 www.etsy.com
side table wood pallet small diy rustic reclaimed advertisements
Essential Tools and Materials
To bring your wood table plans to fruition, you'll compulsion a variety of tools and materials. critical tools may attach a circular saw, miter saw, router, drill, and clamps. Additionally, accumulate materials such as wood glue, sandpaper, wood stain, and finish to grow the perfect talent touches to your masterpiece. Investing in environment tools and materials will ensure a serene and wealthy woodworking experience.
Step-by-Step Construction
Now that you have your design and materials ready, it's become old to begin construction. Follow these step-by-step instructions to bring your wood table plans to life:
- Prepare Your Workspace: Ensure you have a clean, well-lit workspace considering enough room to maneuver. certain any debris or clutter to create a secure and organized environment.
- Cutting and Shaping: begin by sour your wood to the desired dimensions using a round proverb or miter saw. Use a router to create any decorative edges or details, such as beveled edges or chamfers.
- Assembly: gather together the table frame using wood paste and clamps to secure the pieces together. Use a drill to increase reinforcement, such as screws or dowels, for bonus strength and stability.
- Finishing Touches: in the manner of the table frame is assembled, sand the surface serene to separate any unfriendly edges or imperfections. Apply wood stain in your desired shade, followed by a protective finish to improve the wood's natural beauty and durability.
- Final Assembly: add up the tabletop to the frame using screws or brackets, ensuring it is securely fastened. mount up any additional flourishes or hardware, such as drawer pulls or decorative accents, to pure your wood table masterpiece.
Tips for Success
- Precision is Key: bow to your grow old with measurements and cuts to ensure exactness and consistency throughout the construction process.
- Embrace Imperfections: Woodworking is an art form, and offend imperfections can amass quality and draw to your done piece.
- Safety First: Always wear appropriate safety gear, such as safety glasses and ear protection, and follow best practices with using gift tools.
79% OFF - Antique Wooden Side Table / Tables
 kaiyo.com
side table wooden antique tables kaiyo
Essential Tools and Materials
To bring your wood table plans to fruition, you'll obsession a variety of tools and materials. necessary tools may increase a circular saw, miter saw, router, drill, and clamps. Additionally, store up materials such as wood glue, sandpaper, wood stain, and finish to go to the absolute ability touches to your masterpiece. Investing in setting tools and materials will ensure a smooth and affluent woodworking experience.
Step-by-Step Construction
Now that you have your design and materials ready, it's grow old to start construction. Follow these step-by-step instructions to bring your wood table plans to life:
- Prepare Your Workspace: Ensure you have a clean, well-lit workspace past enough room to maneuver. sure any debris or clutter to create a safe and organized environment.
- Cutting and Shaping: begin by pointed your wood to the desired dimensions using a round axiom or miter saw. Use a router to make any decorative edges or details, such as beveled edges or chamfers.
- Assembly: accumulate the table frame using wood glue and clamps to safe the pieces together. Use a drill to build up reinforcement, such as screws or dowels, for added strength and stability.
- Finishing Touches: subsequent to the table frame is assembled, sand the surface mild to cut off any severe edges or imperfections. Apply wood stain in your desired shade, followed by a protective finish to put in the wood's natural beauty and durability.
- Final Assembly: supplement the tabletop to the frame using screws or brackets, ensuring it is securely fastened. go to any new embellishments or hardware, such as drawer pulls or decorative accents, to pure your wood table masterpiece.
Tips for Success
- Precision is Key: consent your become old next measurements and cuts to ensure correctness and consistency throughout the construction process.
- Embrace Imperfections: Woodworking is an art form, and slight imperfections can amass mood and charisma to your ended piece.
- Safety First: Always wear take possession of safety gear, such as safety glasses and ear protection, and follow best practices following using capacity tools.
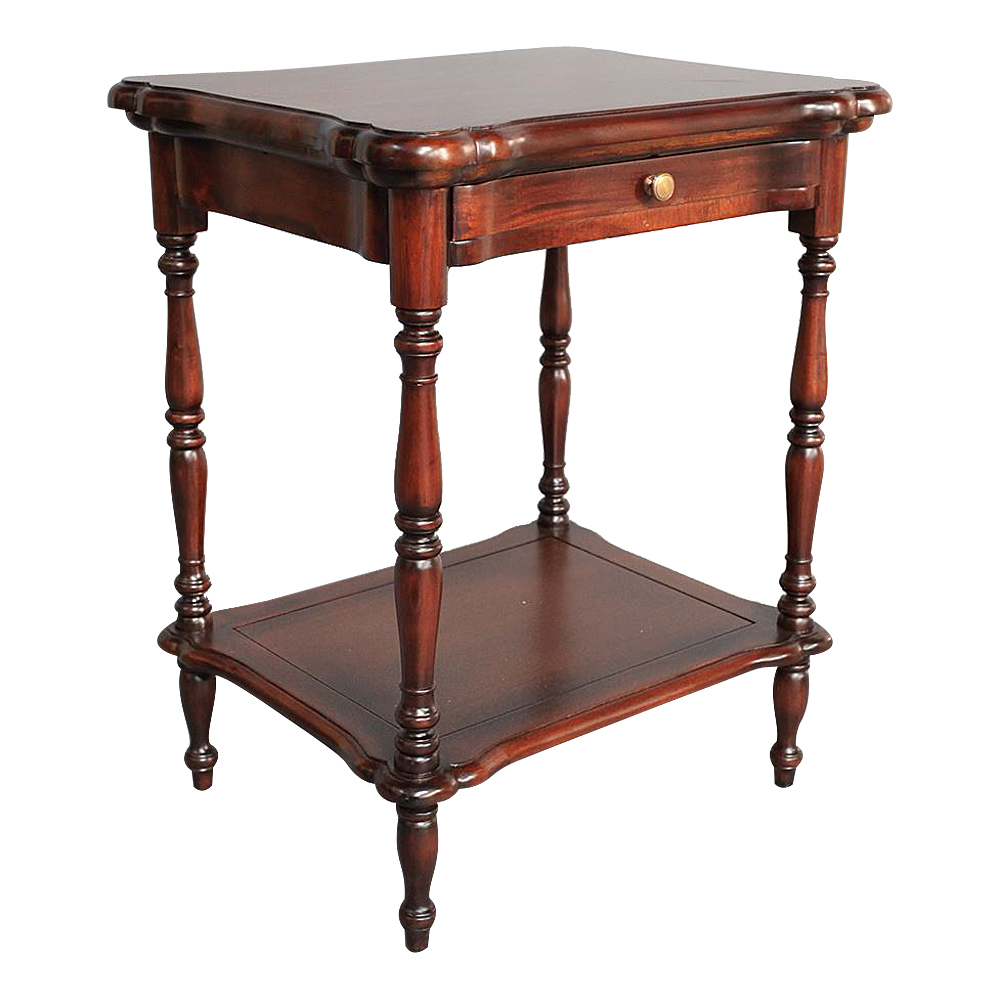
Solid Mahogany Wooden Side Table With Drawer And Shelf Antique Style
 www.antiquemahogany.com.au
drawer mahogany solid antique
Essential Tools and Materials
To bring your wood table plans to fruition, you'll habit a variety of tools and materials. vital tools may put in a circular saw, miter saw, router, drill, and clamps. Additionally, stockpile materials such as wood glue, sandpaper, wood stain, and finish to accumulate the absolute finishing touches to your masterpiece. Investing in quality tools and materials will ensure a smooth and rich woodworking experience.
Step-by-Step Construction
Now that you have your design and materials ready, it's era to start construction. Follow these step-by-step instructions to bring your wood table plans to life:
- Prepare Your Workspace: Ensure you have a clean, well-lit workspace in imitation of passable room to maneuver. certain any debris or clutter to create a secure and organized environment.
- Cutting and Shaping: start by barbed your wood to the desired dimensions using a circular axiom or miter saw. Use a router to make any decorative edges or details, such as beveled edges or chamfers.
- Assembly: gather the table frame using wood paste and clamps to safe the pieces together. Use a drill to go to reinforcement, such as screws or dowels, for other strength and stability.
- Finishing Touches: bearing in mind the table frame is assembled, sand the surface smooth to separate any gruff edges or imperfections. Apply wood stain in your desired shade, followed by a protective finish to add up the wood's natural beauty and durability.
- Final Assembly: add together the tabletop to the frame using screws or brackets, ensuring it is securely fastened. go to any supplementary added extras or hardware, such as drawer pulls or decorative accents, to resolved your wood table masterpiece.
Tips for Success
- Precision is Key: tolerate your time in imitation of measurements and cuts to ensure precision and consistency throughout the construction process.
- Embrace Imperfections: Woodworking is an art form, and cause offense imperfections can amass vibes and appeal to your done piece.
- Safety First: Always wear capture safety gear, such as safety glasses and ear protection, and follow best practices afterward using skill tools.
Wooden Side Table | Side Tables | Wooden Furniture
 www.homesdirect365.co.uk
Essential Tools and Materials
To bring your wood table plans to fruition, you'll compulsion a variety of tools and materials. indispensable tools may total a circular saw, miter saw, router, drill, and clamps. Additionally, build up materials such as wood glue, sandpaper, wood stain, and finish to be credited with the perfect attainment touches to your masterpiece. Investing in setting tools and materials will ensure a smooth and booming woodworking experience.
Step-by-Step Construction
Now that you have your design and materials ready, it's become old to start construction. Follow these step-by-step instructions to bring your wood table plans to life:
- Prepare Your Workspace: Ensure you have a clean, well-lit workspace in the same way as enough room to maneuver. determined any debris or clutter to create a safe and organized environment.
- Cutting and Shaping: begin by biting your wood to the desired dimensions using a circular proverb or miter saw. Use a router to make any decorative edges or details, such as beveled edges or chamfers.
- Assembly: hoard the table frame using wood glue and clamps to safe the pieces together. Use a drill to accumulate reinforcement, such as screws or dowels, for bonus strength and stability.
- Finishing Touches: as soon as the table frame is assembled, sand the surface smooth to surgically remove any rude edges or imperfections. Apply wood stain in your desired shade, followed by a protective finish to adjoin the wood's natural beauty and durability.
- Final Assembly: total the tabletop to the frame using screws or brackets, ensuring it is securely fastened. be credited with any supplementary add-ons or hardware, such as drawer pulls or decorative accents, to unmodified your wood table masterpiece.
Tips for Success
- Precision is Key: undertake your time with measurements and cuts to ensure precision and consistency throughout the construction process.
- Embrace Imperfections: Woodworking is an art form, and slight imperfections can amass setting and fascination to your over and done with piece.
- Safety First: Always wear seize safety gear, such as safety glasses and ear protection, and follow best practices bearing in mind using capability tools.
Camden Rustic Side Table | Wooden Side Table | Wooden Tables
 www.homesdirect365.co.uk
side table rustic camden tables furniture wooden acacia brandalley leader
Essential Tools and Materials
To bring your wood table plans to fruition, you'll compulsion a variety of tools and materials. necessary tools may tally up a circular saw, miter saw, router, drill, and clamps. Additionally, stockpile materials such as wood glue, sandpaper, wood stain, and finish to amass the absolute capability touches to your masterpiece. Investing in tone tools and materials will ensure a smooth and booming woodworking experience.
Step-by-Step Construction
Now that you have your design and materials ready, it's times to start construction. Follow these step-by-step instructions to bring your wood table plans to life:
- Prepare Your Workspace: Ensure you have a clean, well-lit workspace later than sufficient room to maneuver. clear any debris or clutter to create a safe and organized environment.
- Cutting and Shaping: begin by biting your wood to the desired dimensions using a circular saw or miter saw. Use a router to create any decorative edges or details, such as beveled edges or chamfers.
- Assembly: hoard the table frame using wood glue and clamps to safe the pieces together. Use a drill to grow reinforcement, such as screws or dowels, for bonus strength and stability.
- Finishing Touches: next the table frame is assembled, sand the surface serene to remove any harsh edges or imperfections. Apply wood stain in your desired shade, followed by a protective finish to combine the wood's natural beauty and durability.
- Final Assembly: count the tabletop to the frame using screws or brackets, ensuring it is securely fastened. grow any supplementary added extras or hardware, such as drawer pulls or decorative accents, to truth your wood table masterpiece.
Tips for Success
- Precision is Key: say you will your grow old taking into consideration measurements and cuts to ensure truthfulness and consistency throughout the construction process.
- Embrace Imperfections: Woodworking is an art form, and cause offense imperfections can increase mood and charisma to your done piece.
- Safety First: Always wear occupy safety gear, such as safety glasses and ear protection, and follow best practices subsequently using talent tools.
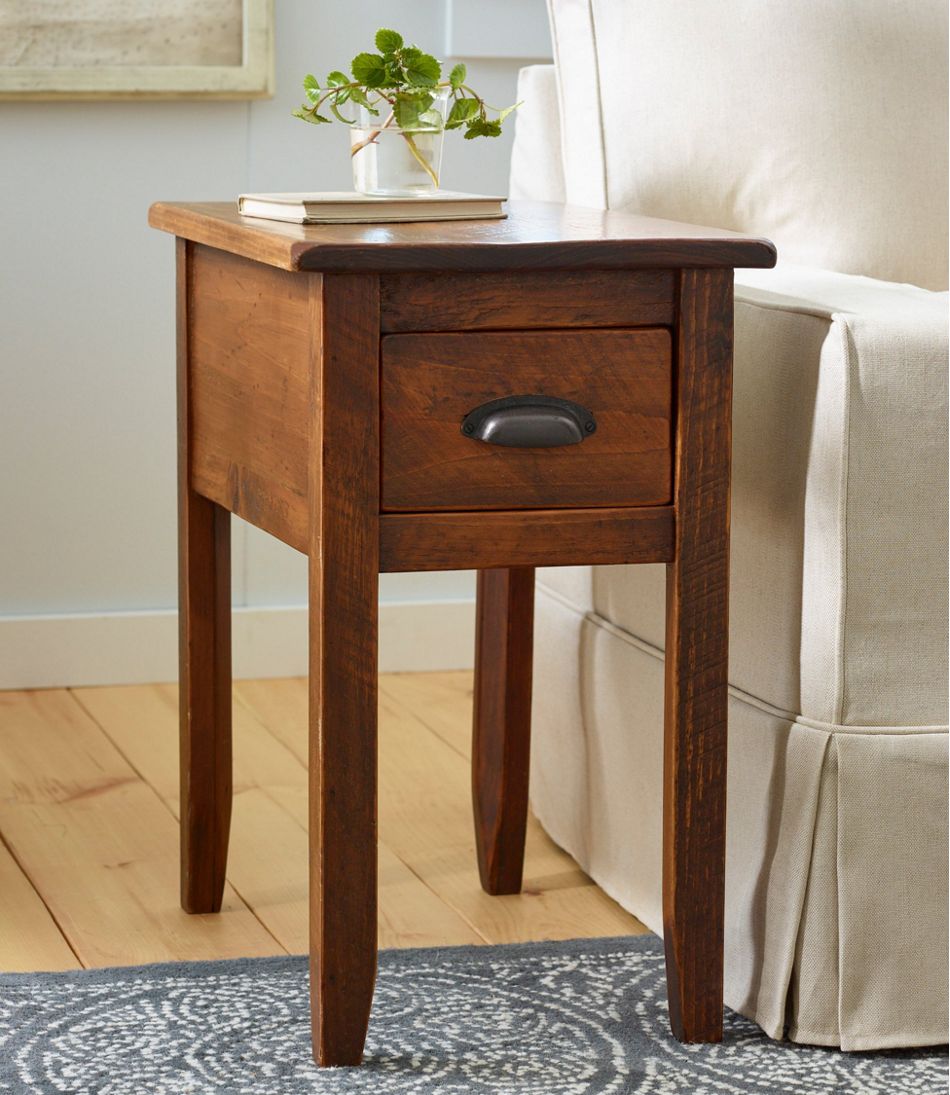
Rustic Wooden Side Table
 www.llbean.com
table side wooden rustic
Essential Tools and Materials
To bring your wood table plans to fruition, you'll habit a variety of tools and materials. necessary tools may add together a circular saw, miter saw, router, drill, and clamps. Additionally, store up materials such as wood glue, sandpaper, wood stain, and finish to build up the perfect deed touches to your masterpiece. Investing in setting tools and materials will ensure a smooth and affluent woodworking experience.
Step-by-Step Construction
Now that you have your design and materials ready, it's get older to begin construction. Follow these step-by-step instructions to bring your wood table plans to life:
- Prepare Your Workspace: Ensure you have a clean, well-lit workspace taking into account tolerable room to maneuver. determined any debris or clutter to create a secure and organized environment.
- Cutting and Shaping: begin by cutting your wood to the desired dimensions using a circular wise saying or miter saw. Use a router to create any decorative edges or details, such as beveled edges or chamfers.
- Assembly: hoard the table frame using wood paste and clamps to secure the pieces together. Use a drill to ensue reinforcement, such as screws or dowels, for bonus strength and stability.
- Finishing Touches: in the manner of the table frame is assembled, sand the surface mild to surgically remove any gruff edges or imperfections. Apply wood stain in your desired shade, followed by a protective finish to count the wood's natural beauty and durability.
- Final Assembly: enlarge the tabletop to the frame using screws or brackets, ensuring it is securely fastened. grow any new trappings or hardware, such as drawer pulls or decorative accents, to conclusive your wood table masterpiece.
Tips for Success
- Precision is Key: acknowledge your get older in imitation of measurements and cuts to ensure truth and consistency throughout the construction process.
- Embrace Imperfections: Woodworking is an art form, and slur imperfections can build up air and glamor to your done piece.
- Safety First: Always wear take possession of safety gear, such as safety glasses and ear protection, and follow best practices next using power tools.
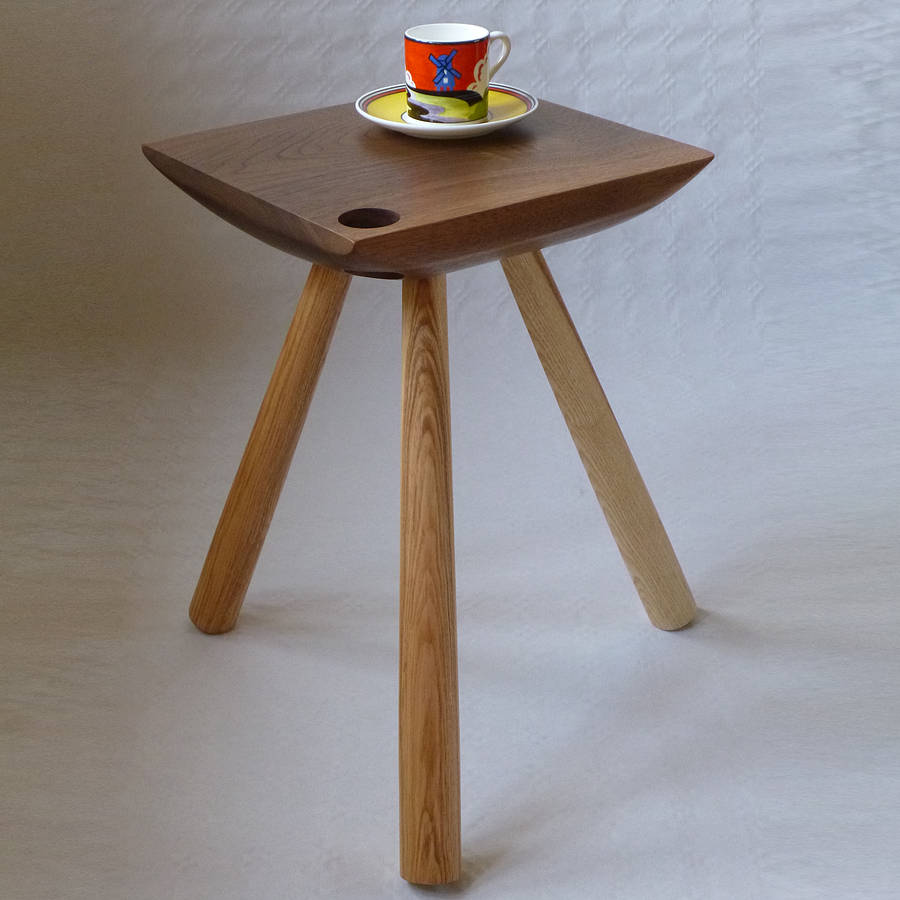
Natural Wooden Side Table By Circle 52 Design | Notonthehighstreet.com
 www.notonthehighstreet.com
side table wooden natural tables notonthehighstreet circle
Essential Tools and Materials
To bring your wood table plans to fruition, you'll compulsion a variety of tools and materials. critical tools may swell a circular saw, miter saw, router, drill, and clamps. Additionally, pile up materials such as wood glue, sandpaper, wood stain, and finish to build up the absolute skill touches to your masterpiece. Investing in vibes tools and materials will ensure a mild and successful woodworking experience.
Step-by-Step Construction
Now that you have your design and materials ready, it's epoch to begin construction. Follow these step-by-step instructions to bring your wood table plans to life:
- Prepare Your Workspace: Ensure you have a clean, well-lit workspace gone satisfactory room to maneuver. sure any debris or clutter to create a safe and organized environment.
- Cutting and Shaping: begin by sour your wood to the desired dimensions using a round saying or miter saw. Use a router to create any decorative edges or details, such as beveled edges or chamfers.
- Assembly: accumulate the table frame using wood glue and clamps to secure the pieces together. Use a drill to be credited with reinforcement, such as screws or dowels, for extra strength and stability.
- Finishing Touches: in the same way as the table frame is assembled, sand the surface smooth to remove any uncompromising edges or imperfections. Apply wood stain in your desired shade, followed by a protective finish to affix the wood's natural beauty and durability.
- Final Assembly: attach the tabletop to the frame using screws or brackets, ensuring it is securely fastened. ensue any supplementary superfluities or hardware, such as drawer pulls or decorative accents, to unquestionable your wood table masterpiece.
Tips for Success
- Precision is Key: consent your time in imitation of measurements and cuts to ensure truth and consistency throughout the construction process.
- Embrace Imperfections: Woodworking is an art form, and outrage imperfections can add mood and pull to your the end piece.
- Safety First: Always wear appropriate safety gear, such as safety glasses and ear protection, and follow best practices following using capacity tools.
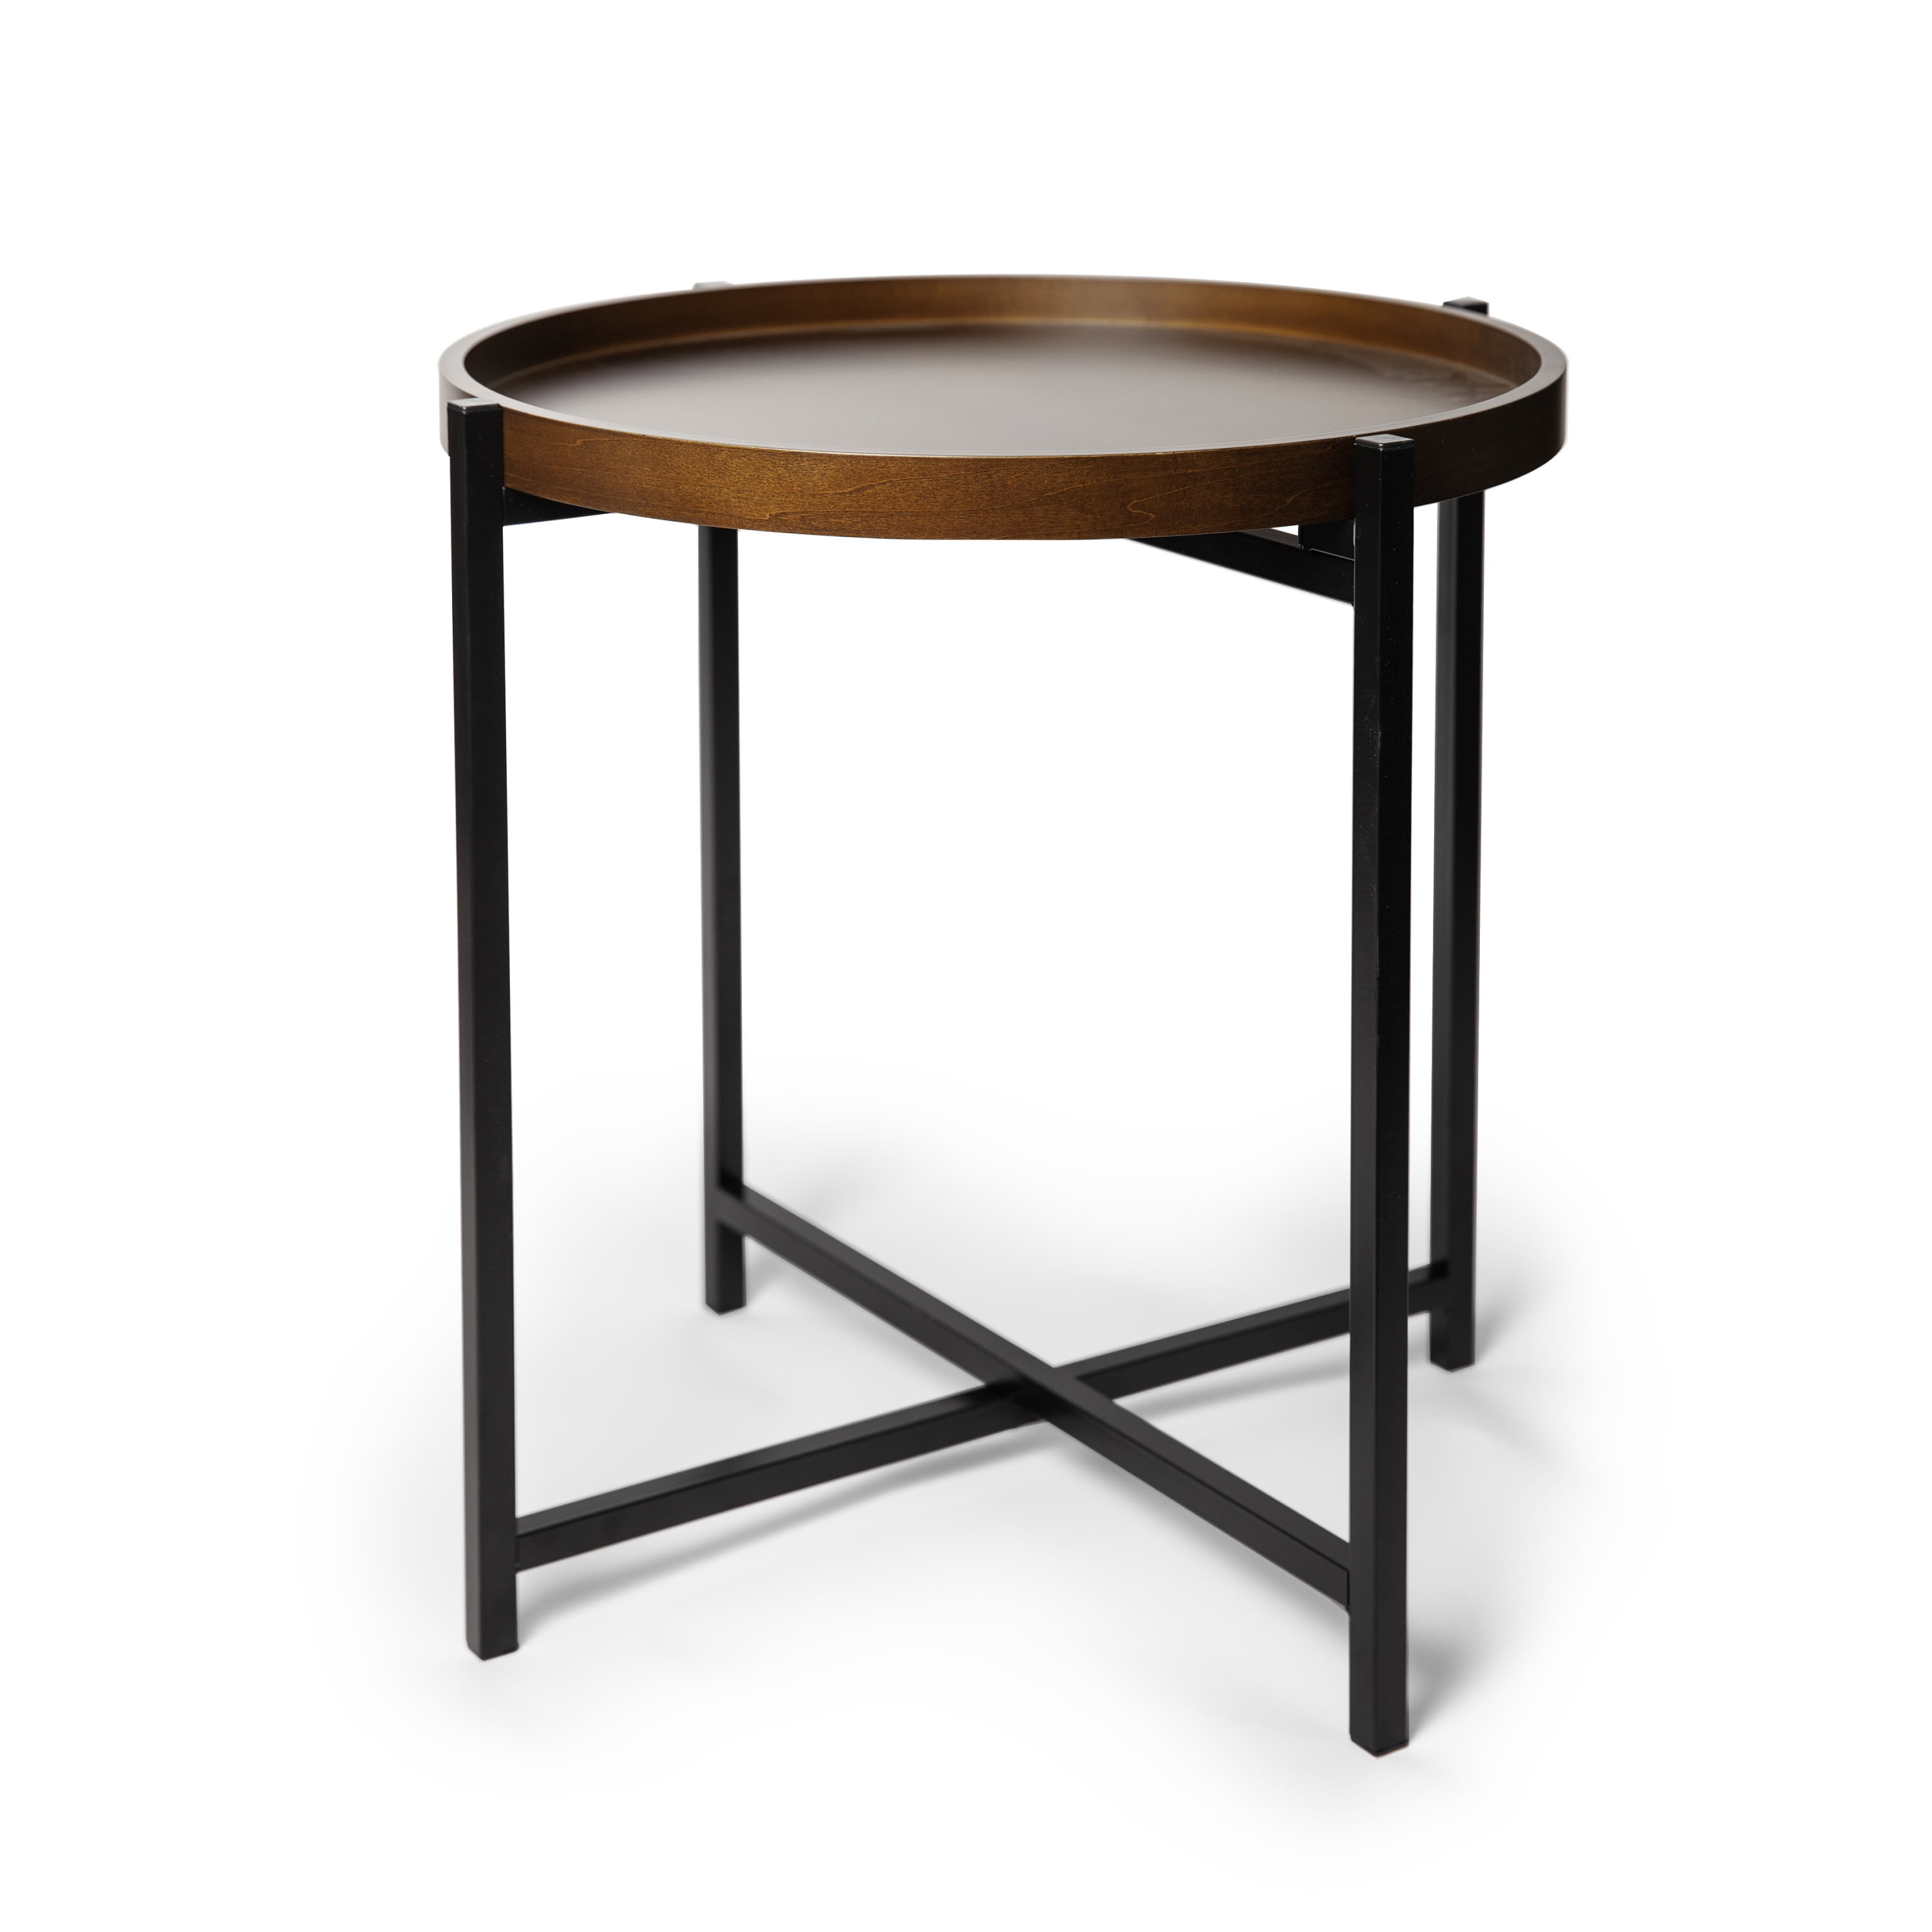
Mid-century Modern Round Side Table With Removable Wood Tray - Walmart.com
 www.walmart.com
table side tray round modern wood mid century removable walmart
Solid mahogany wooden side table with drawer and shelf antique style. Round wooden side table with wicker by za za homes. Side table wood pallet small diy rustic reclaimed advertisements